Content from Introduction
Last updated on 2024-12-31 | Edit this page
Overview
Questions
- How can digital tools facilitate the process of managing a digital exhibition/experience project?
- How can appropriate digital methods assist the development of a multimedia application for heritage interpretation?
Objectives
- Understand what the key steps and tools are to facilitate managing a digital exhibition/experience project
- Use appropriate methods and tools to assist the design of such application (e.g., personas, storyboard)
Tutorial
For this exercise we will outline a digital exhibition/experience application by going through the following steps:
- Choose context in terms of theme
- Choose our user through the persona building method
- Use project canvas to provide an overview of the digital experience project
- Build a storyboard for the proposed digital experience application
Content from Choose Context
Last updated on 2024-12-31 | Edit this page
Choose context in terms of theme
Please look at some of the proposed themes to help you define the contextual parameters of your digital experience. Pay attention to the information and media provided, i.e. texts, images, videos, 3D models etc. You can choose a theme from the list below or another theme of your choice through Europeana.

These are some proposed themes with indicative stories to help you choose the context of your application:
- Industrial heritage: https://www.europeana.eu/en/stories?tags=industrial-heritage&page=1
- Crafts: https://www.europeana.eu/en/stories?tags=crafts
- Photography: https://www.europeana.eu/en/stories?tags=photography
- Fashion: https://www.europeana.eu/en/stories?tags=fashion
When choosing your theme, please pay attention to texts, images, videos and all the media which are available to support it.
Content from Choose User
Last updated on 2024-12-31 | Edit this page
Choose your user through the persona building method
First, download the Persona builder template.
If you would rather use an online tool or template to create a persona, you can also have a look at the following:
Now in this step you will use the persona building method, which is established in User Experience (UX) design to define key characteristics of the user of your application.
Please bear in mind that we are interested in personas within the arts/heritage digital interpretative experience context. Hence key points we are interested in are:
- Information about our persona in terms of age, occupation, family status, location (where this person lives), electronic devices they use.
- Experience in internet/pc, mobile/table, social media use.
- Quote, i.e., a phrase that exemplifies this persona’s attitudes and might include some information with regard to digital interpretative experiences, use of technology, personal interests etc. For instance:
I would like to discover hidden stories about the museum’s collections.
I like geography and video games. I wish museums were more relevant to my interests.
- A summary of our persona’s background, life priorities, motivations to enjoy (or not) art and heritage, visiting styles and more. An example of a summary could be:
Sarah is 23 years old and is working as a hotel manager in central London. Sarah shares a flat in Brixton with her friend Martha. She grew up in Folkestone and studied Business and Tourism in London. She loves the capital’s vibrant atmosphere and enjoys visiting photography exhibitions and art museums with friends every couple of weeks. Sarah loves taking photographs with her mobile phone and is keen to expand her knowledge to photography soon.
- Digital exhibition/experience goals, i.e., reflecting on goals and expectations of the persona with regards to the proposed application. For instance:
To easily access information within limited visiting time.
To entertain my children in the museum and spark their interest.
- Digital exhibition/experience frustrations, i.e., thinking about the aspects that would frustrate your persona and prevent them from enjoying the proposed application. For instance:
I don’t like reading long texts in museum apps.
I don’t want to follow a predefined path when visiting a museum, I want to see the things that are closer to my interests.


Some examples to help you through the persona design process are the following:
- Sun, C. (2020-2023). Muse project. Retrieved from: https://www.clairsun.design/work/muse-discovery-art
- Roussou, M., Katifori, A., Pujol, L., Vayanou, M., & Egglestone, S.R. (2013). A life of their own: museum visitor personas penetrating the design lifecycle of a mobile experience. CHI ’13 Extended Abstracts on Human Factors in Computing Systems. Retrieved from: https://www.semanticscholar.org/paper/A-life-of-their-own%3A-museum-visitor-personas-the-of-Roussou-Katifori/6a2bbf76860bd579151b0efbfd004cb5358aa06a
Content from Provide an Overview
Last updated on 2024-12-31 | Edit this page
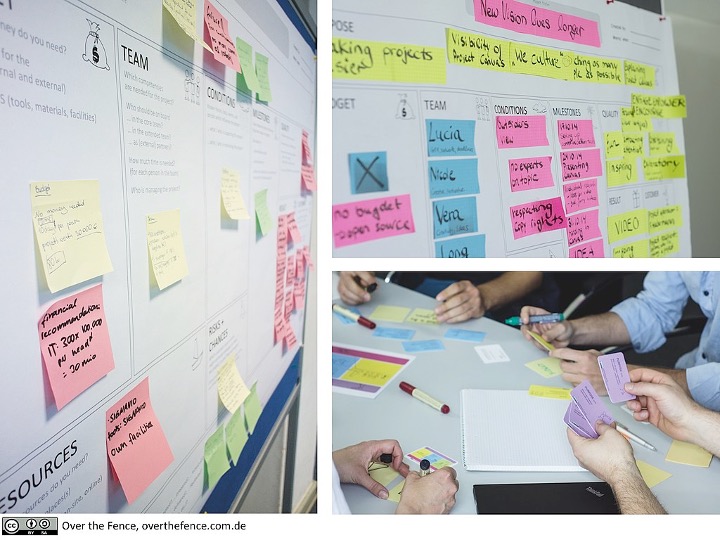
Use project canvas to provide an overview of the digital experience project
First download the project canvas template. There is also the option to work on an editable template on Miro if you prefer - you will need to create an account.

Given that you have already built your persona and you have chosen the context/theme of your application, here you will have to plan your project. In this case, the project is defined as the digital exhibition/experience multimedia application for a given audience within a certain context.

The sections of the project canvas require the following information:
- Purpose: The reason for working on this application project and your intention, i.e., what you want to achieve by introducing it and how the application will benefit audiences.
- Scope: What are the areas the project will cover and what it will not cover, e.g., a given collection for a given audience.
- Success criteria: How to determine that the interpretative application has achieved its result. What are the goals, the benefits that the application brings and how this will be measured (e.g., how many people will download the app, how many visits on the museum’s website we aim for).
- Outcome: This is the desired result of the project, as supported by the rest of the project canvas. Here you have to describe what will be delivered to achieve the purpose of the project. The outcome should be Specific, Measurable, Acceptable, Realistic (SMART).
- Milestones: Significant check points of the application development. These milestones are helpful to organise the project, as well as to communicate it to others. Here you define deadlines and milestones for your application development (e.g., requirements gathered, content ready).
- Actions: These are the tasks and activities (e.g., a task might comprise several activities). In actions, you describe what you will create, organise, test or produce (e.g., produce survey to gather requirements, digitise material). Actions can be kept at a higher level or describe activities in more detail.
- Team: Members your team consists of and their roles. Interdisciplinarity is key when choosing people and roles.
- Stakeholders: Stakeholders are the people interested or affected by the proposed application. They can provide valuable input and assistance throughout the development of your application. This might include consultants or specific groups, such as teachers and disability advisors.
- Users: Who are the users of the proposed application? These are the people you expect to benefit from introducing the application.
- Resources: This is a critical aspect when planning your application. Here you need to define tangible and intangible resources to be able to perform actions. Here you need to look at in house knowledge/skills and materials and decide if you need to outsource knowledge/skills.
- Constraints: The barriers and limitations to develop your application, such as time, cost, knowledge, technology. This might refer to restrictions, i.e., not being able to use certain copyrighted material, not having IT development capacity in your institution.
- Risks: Risks should be identified to plan how to prevent/counterbalance their effect. Here you can think of what can affect our application, the threats that you might encounter and how to reduce risk (e.g., device might be stolen from gallery, hence we need to attach it to a base preventing theft or loss).
More information can be found on the Project Canvas manual.
Content from Build a Storyboard
Last updated on 2024-12-31 | Edit this page
Build a storyboard for the proposed digital experience application
In this step, you will build the storyboard for your application. Please download the storyboard template from here: https://museumsvictoria.com.au/media/6716/making-history-storyboard-tempate.pdf. There is also the option to work on an editable template on Miro if you prefer - you will need to create an account.

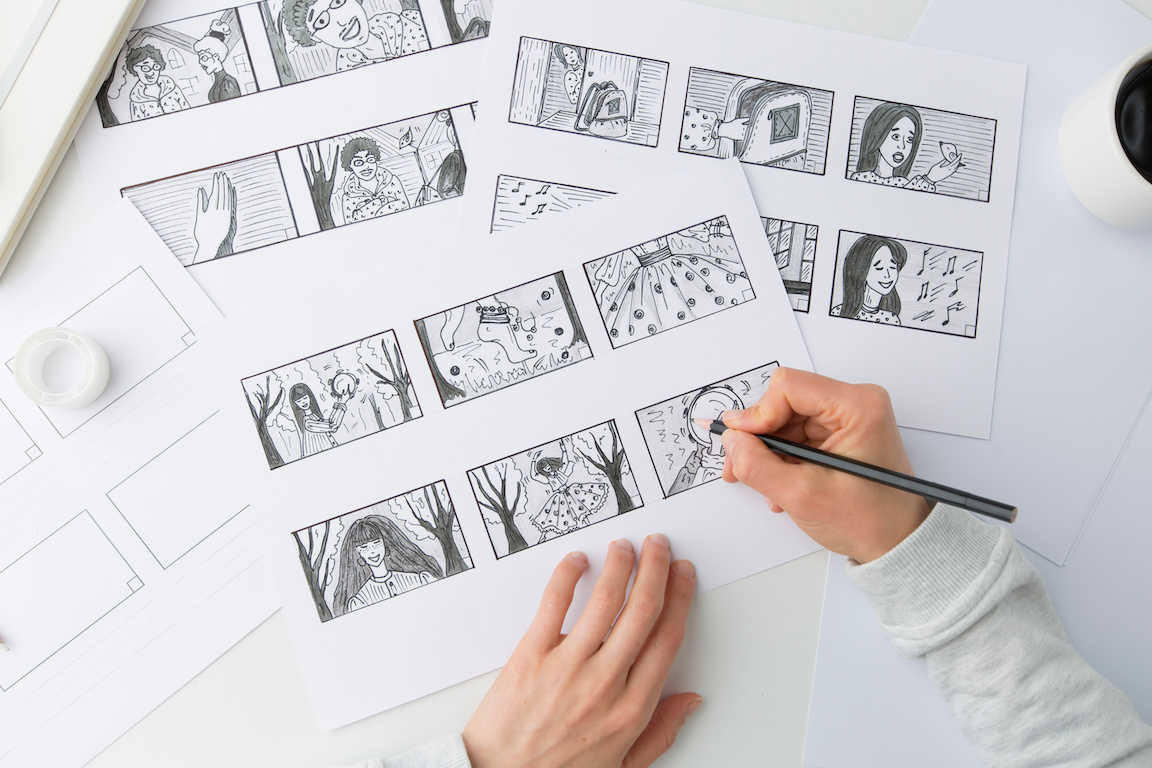
Here, you will have to think about your context, user and project plan as you set it up in previous steps and start creating a storyboard. A storyboard can be perceived as a graphic organisation of the scenes/sequence of the proposed application in terms of visually organising our media and access to information. The storyboard’s purpose is to outline access/initiation of the application and walk through it in terms of the information/multimedia that will be included.
Now look at the examples below:
- Chaudhsry, A. (2022). Case Study: Virtual art gallery tour app. Retrieved from: https://bootcamp.uxdesign.cc/case-study-virtual-art-gallery-tour-app-615150c81978
- Ng, C. (2019). Connecting Solo Museum Visitors. Retrieved from: https://chloenhy.github.io/museum-visitors/
Think of the following information to include in your storyboard:
- How will the user access the application?
- What will be the starting screen/scene of the application?
- How will the user access the next/following scenes and how they will access information?
- What are the media to include (images, videos, texts, 3D models, audio etc)?
- What will be the closing scene?
In the storyboard template, the first box of the storyboard will be used to sketch what is happening in each scene. The action box is dedicated to the description of what is happening in each scene. In the narration/caption box, you can fill in a phrase/message/blurb as it will appear to the user and lastly, the music/sound effect box can provide some information about the sound/s which accompany the information provided on each scene/screen (if present).
The most important thing to remember when designing a storyboard is to be creative, work as a team and produce/test many drafts which can help you to decide about the final visual organisation of the proposed application.
Content from More information
Last updated on 2024-12-31 | Edit this page
Interactive multimedia experiences in CH
Interactive multimedia experiences in CH can be classified under different criteria (e.g. purpose/function, audience, media, device, location, involvement of senses).
Some examples of digital multimedia experiences in the context of CH can be found below:
- Online collection explorations: Smithsonian National Museum of Natural History – Human evolution
- Online storytelling exhibits: Google Arts & Culture – Wood carving Craft, Brighton & Hove Museums – A short rife in a log walk
- Journey makers: Art Institute Chicago – Journey maker
- Virtual tours: Sir John Soane’s Museum – Virtual tour, Vizcaya Museum and Gardens – Virtual tour
- Interactions with holograms: Illinois Holocaust Museum & Education Centre – Survivor Stories Experience
- VR/AR applications: Iron Age funerary urn from Saltdean, Sussex, CHESS AR stories at the Acropolis Museum
- Audio tours: Ashmolean Museum Oxford – Rebellious Bodies
- Educational applications/games: Science Museum – Total darkness, American Museum of Natural History – Ology
- Creative activities: V&A – Make & Do: Stitch and sew
- Well-being activities: National Gallery - Van Gogh’s ‘Wheatfield, with Cypresses’ 5 minute meditation
- Podcasts: Tate podcasts
- Smart replicas/exhibitions: Smart replicas, Allard Pierson Museum - Smart exhibition ‘Schijnbeweging’
